Video Guide to Setup and Initialse USB eToken for DigiCert or Verokey
Step 1. Ordering your Code Signing Certificate
You will need to order a code-signing certificate from a trusted Certificate Authority. We have a number available here from SSLTrust and would highly recommend the Verokey range. This tutorial is for the Verokey and DigiCert Code Signing Certificates.
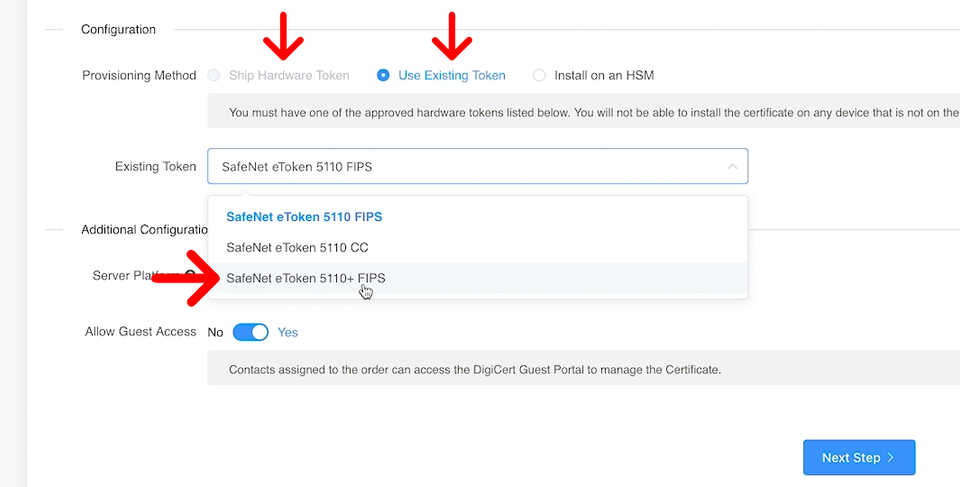
As this tutorial is the process of installing your new certificate onto a USB eToken, you will need to make sure you have the provisioning method on the order page selected as Ship new USB eToken or if you already have one ready to use Use Existing USB eToken
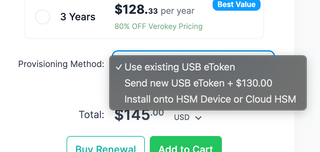
With your new certificate added to the shopping cart, complete the checkout with payment, and your new service will appear in your SSLTrust account.
Step 2. Configure your new Code Signing Certificate
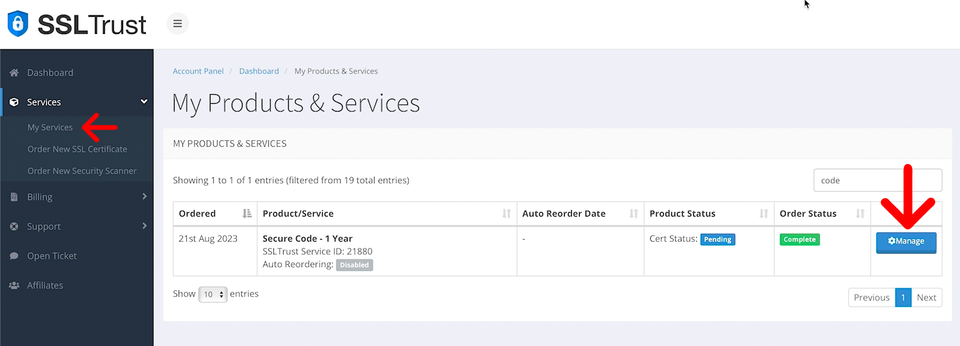
Login to your SSLTrust account, and from the Services menu, view your new Code Signing Certificate and click Manage.
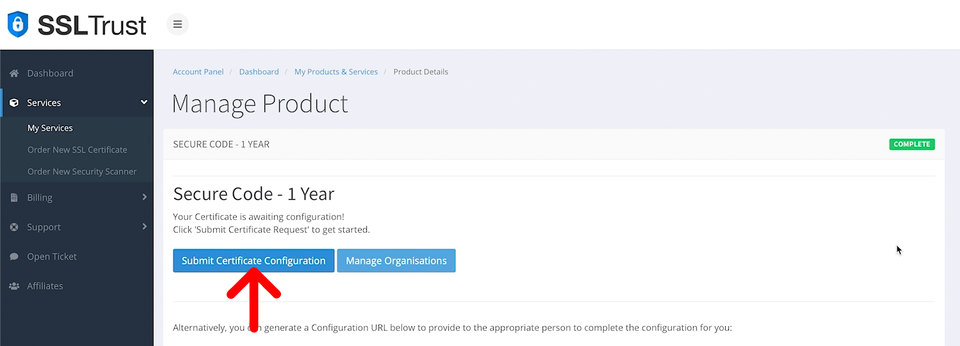
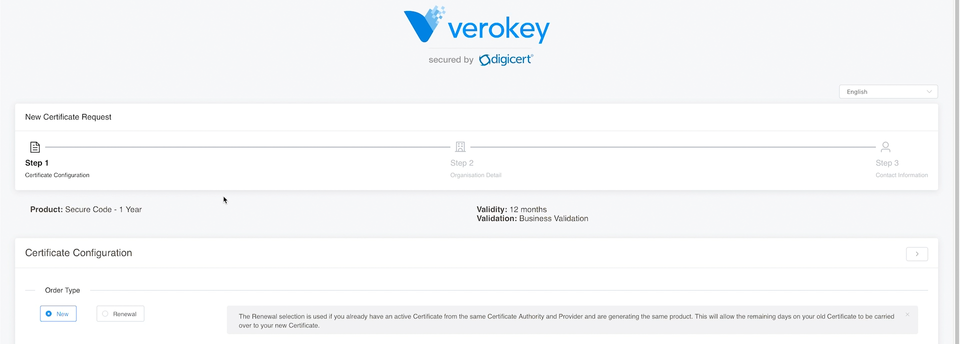
From the Manage Product page, you will see a button to Submit Certificate Configuration; click this to be taken to the configuration page.
Now, you want to select your provisioning method. If you selected to Ship a new USB eToken on your order, make sure that is selected here. Or if you already have one, select to use your Existing USB eToken. If you have an existing eToken from DigiCert or Verokey it will most likely be a SafeNet eToken 5110+. However, you can check and confirm this by viewing your token in the SafeNet application.
The server platform selection will not affect the end-issued Certificate, so you can select OTHER here.
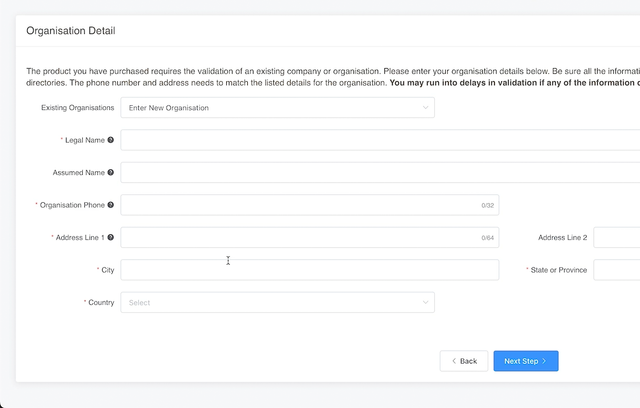
After you make your selections and click NEXT, you be asked to enter your organisation details. Make sure these are all correct and the address and phone number can be easily found online. The verification team will be checking online business directories such as DUNS, Google Business, Yellow Pages and more to verify the details. They will also do a verification phone call on the phone number they find.
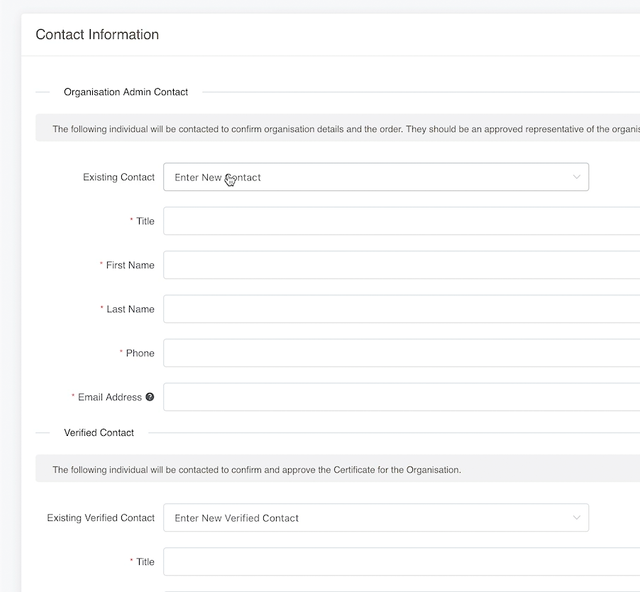
And lastly, you will need to enter your organisation's contact details. These are the individuals to approve the order and confirm that you have ordered a Code Signing Certificate for the organisation.
Once all details are entered, submit your configuration. You will then be taken to the validation manager, which can provide you with status updates while your organisation is being verified by the validation team. You can access the validation manager via your SSLTrust account product/service management page.
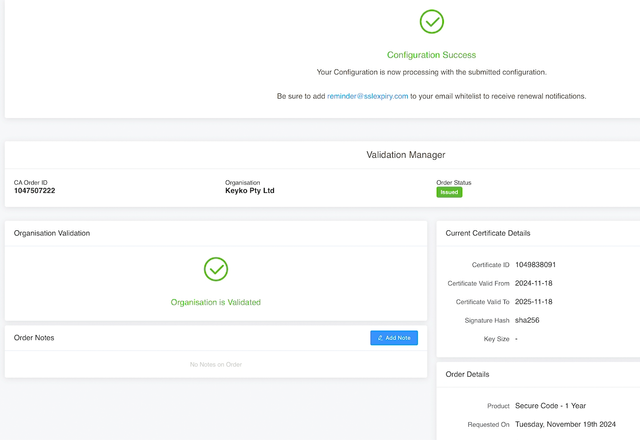
Organisation Verification
The organisation details and contacts will need to be verified by the DigiCert validation team. This can take 1-5 business details and can depend on how well-listed your organisation is online. Be sure to keep an eye out for any emails from them and a verification phone call. If you don't hear from them within 2 business days, please reach out to our support team and we can check on the status and provide you with updates.
You will also receive a final order approval email to approve the order when it is ready to be issued.
When all is completed and your certificate is issued, you will be sent your USB eToken if you selected to have a new one shipped. Or you can proceed to initialise your existing eToken.
Step 3. Setup and Initialise your USB eToken
When you receive your USB eToken, or if you have one already, you will need to initialise it to install your new Code Signing Certificate.
Firstly, you will need to download the SafeNet drivers.
Go here to download the SafeNet Drivers
Once the Drivers are installed, you must install the Windows DigiCert Hardware Certificate Installer.
https://www.digicert.com/StaticFiles/DigiCertHardwareCertificateInstaller.zip
If you're using a Mac, I recommend using the free personal version of VMWare, which allows you to install and run Windows for free.
With all the drivers installed, plug in your USB eToken
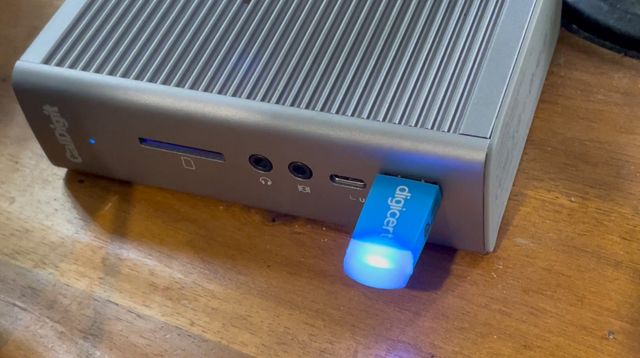
And launch the Hardware Certificate Installer.
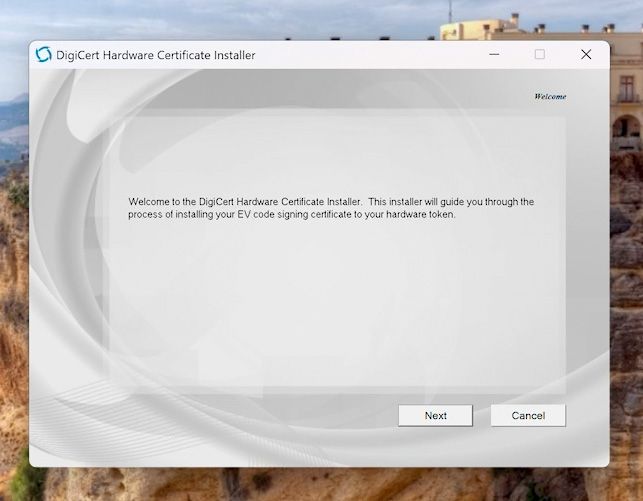
Continue through the steps until it asks you for the initialisation code.
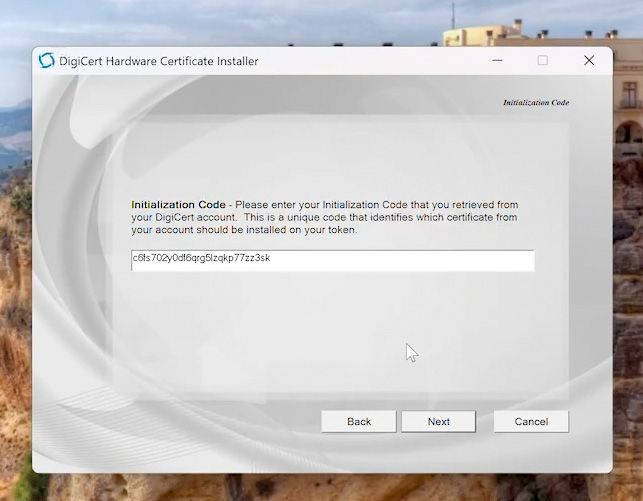
You can get this code by accessing the service in your SSLTrust account again and clicking the View Order Details button. And then show the initialisation code.
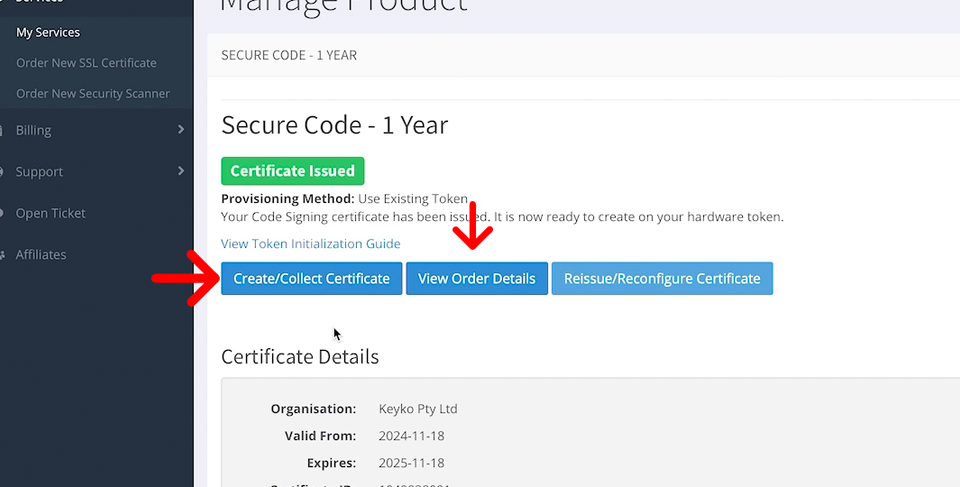
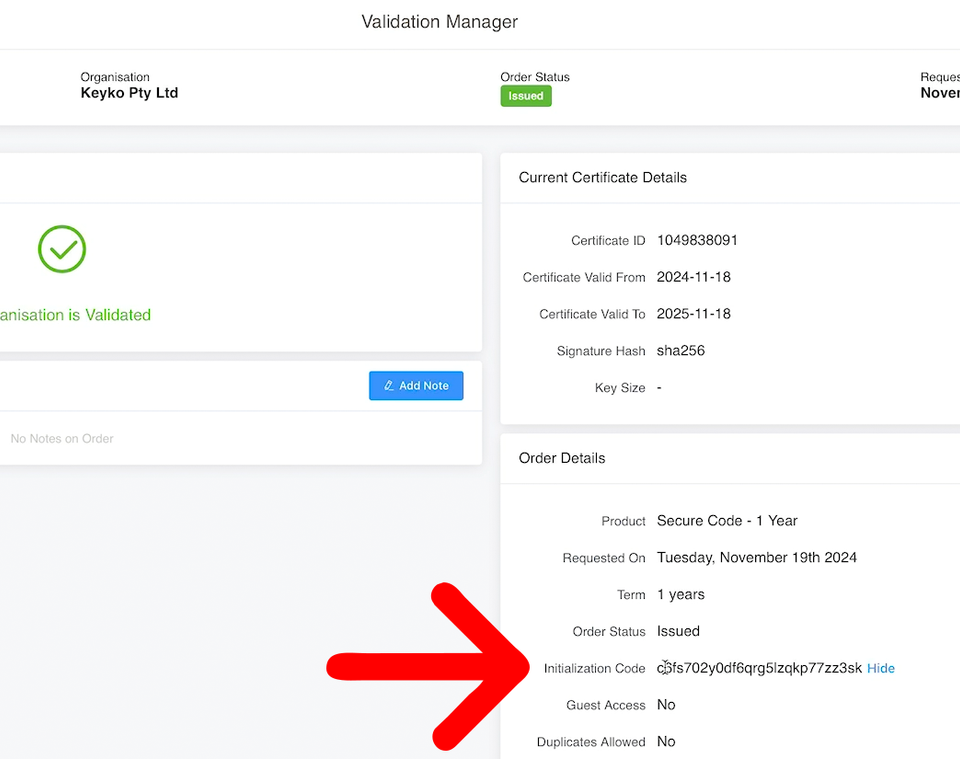
So enter your code into the Hardware Installer and continue to the next step.
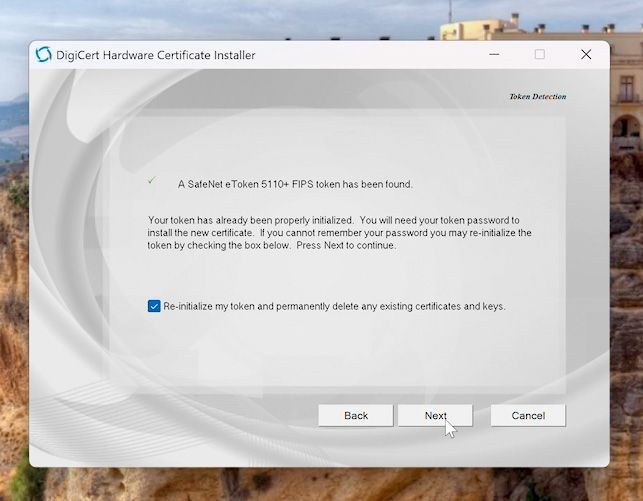
You will be asked to Re-Initialise the token and delete any existing keys. You will need to select this to have the new Certificate installed along with a new Key generated.
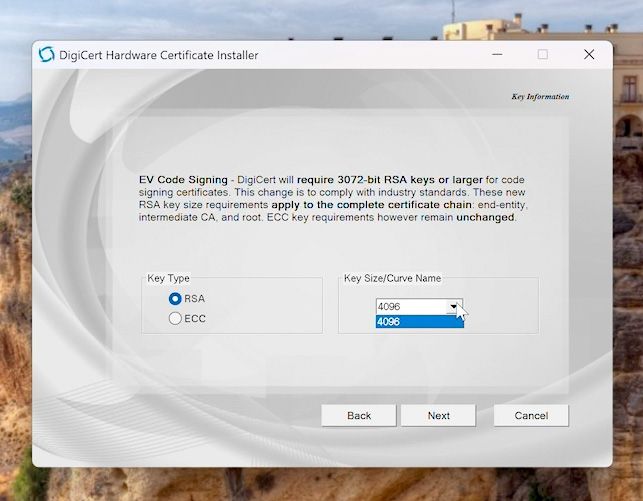
Now, you need to continue and select the Key Type and Size. If you're not sure what to select here, RSA is a good choice with a 4096 Key size.
Continue and enter a Token name and Token Password. The token password is what you will need to access the certificate to complete any signings.
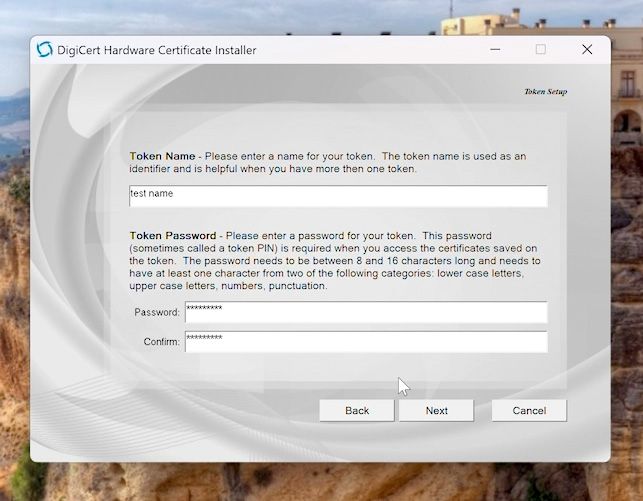
Finally you will need to set a token Administrator password. This is for when you want to make any modifications to the token settings.
If you set this, make sure you do not lose the password, as you may brick the token if you enter the wrong admin password multiple times. You can select to leave the password to the default which is "0" 48 times.
With all that done, click Finish for the installer to generate the Private Key on the token and download and install your new Certificate.
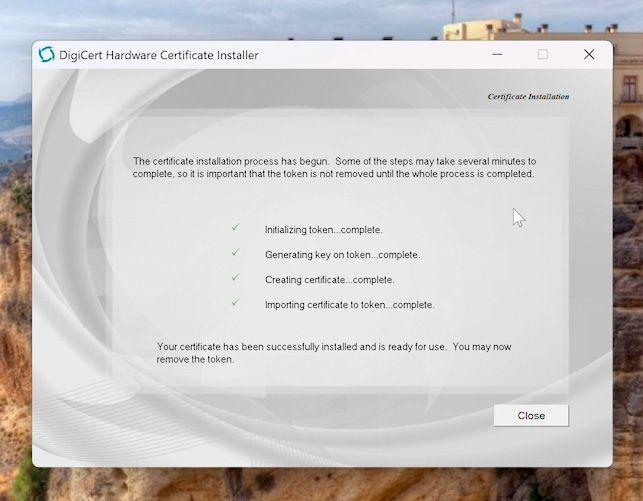
Your token is now ready to be used with the tools you use for signing.
Additional Step. Stop Token Password Expiry
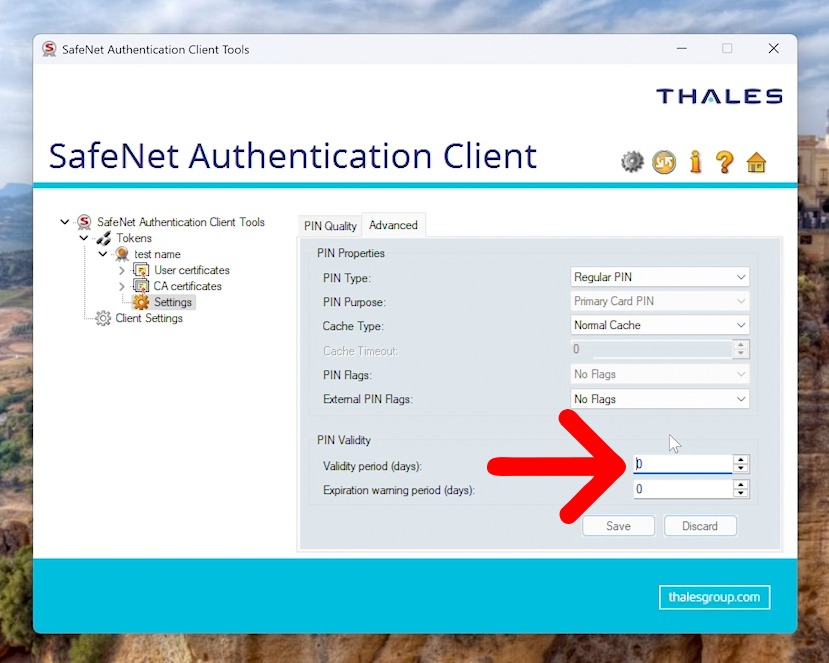
Your token password/PIN will expire every 30 days, which will require you to launch the Safenet driver application and set a new password. If you don't want it to expire, you can launch the SafeNet Application now. When your token shows up, click the Settings button.
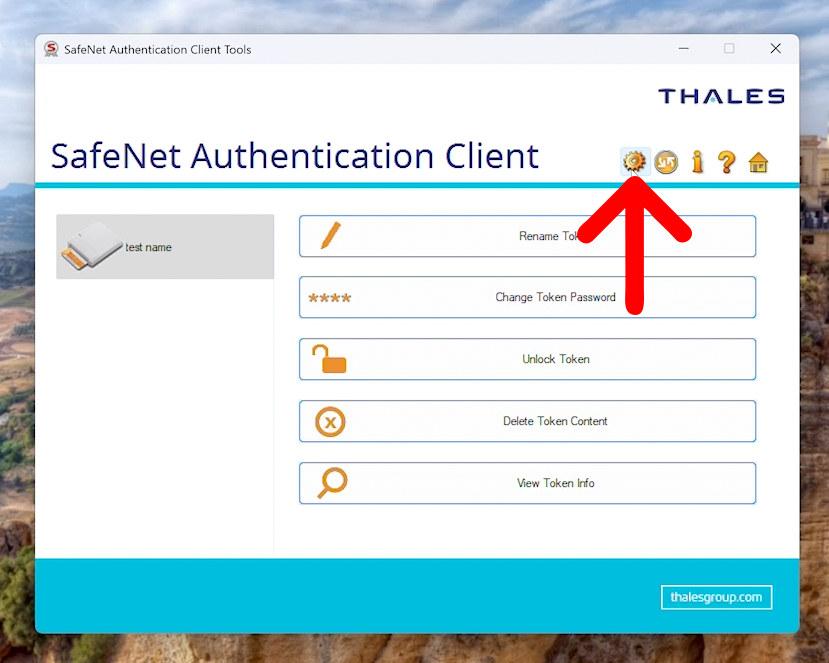
From the settings section, go to the advanced settings.
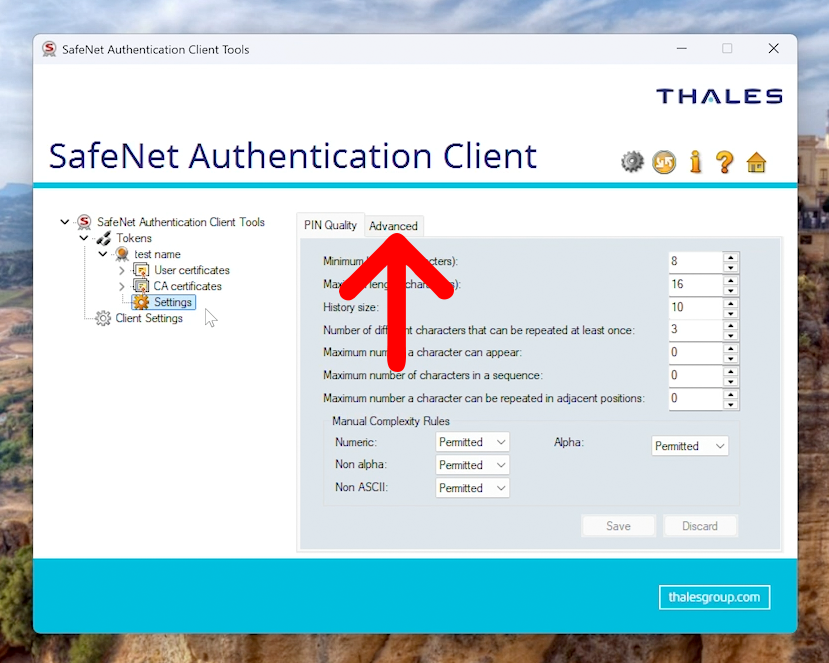
You will now see a setting to change the Validity Period. You will want to change this to 0 and click Save. You will need to enter your Administrator password to apply the settings.
You are now ready to sign your applications and code.
Discussions and Comments
Click here to view and join in on any discussions and comments on this article.


