Virtualizor SSL Installation Video Guide
Step 1. Generate a CSR + Private Key
Firstly, you will have to generate a CSR (Certificate Signing Request) and its corresponding Private Key. A CSR is essential for obtaining an SSL/TLS certificate, serving as an encrypted request to a Certificate Authority (CA) for authentication. The Private Key, on the other hand, is a crucial component used to decrypt and secure data transmissions. Understanding these components ensures a secure and reliable digital environment for your website or application.
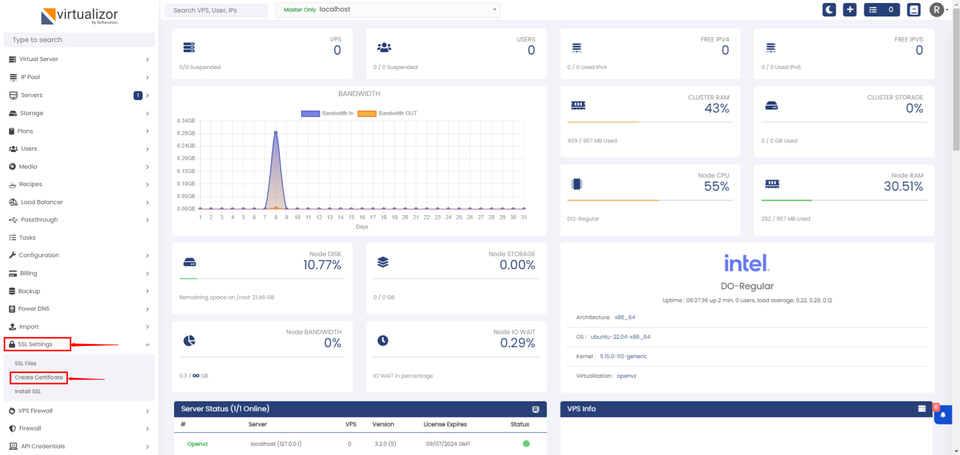
1: Login to your account on Virtualizor and you will see the dashboard. Navigate to the SSL Settings on the bottom left and then click on "Create Certificate"
2: Fill in your details and click on "Create SSL"
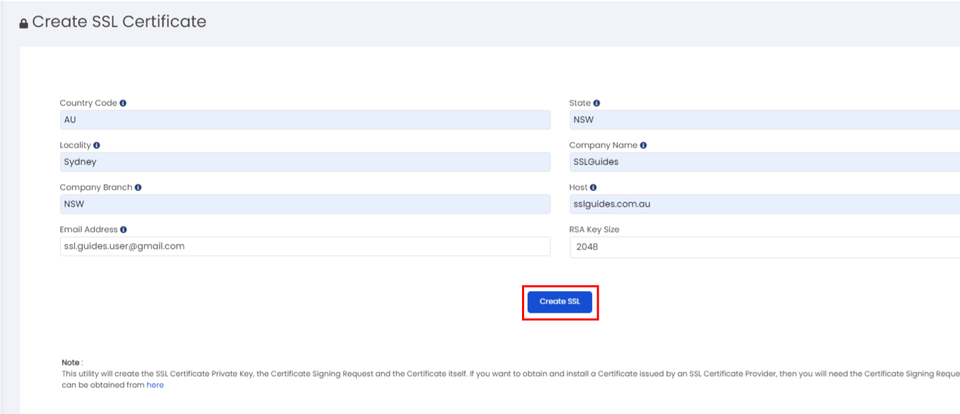
Country Name (2 letter code) [AU]: Type in the 2 letter abbreviation for your country.
State or Province Name (full name) [Some-State]: Full name of the state
Organization Name (eg, company) [Internet Widgits Pty Ltd]:Locality Name (eg, city) []: Complete name of the city, no abbreviations
Organization Name (eg, company) [Internet Widgits Pty Ltd]: If you are a business; Enter your legal entity name. If you're not a business, any value entered will not be used in your certificate.
Organizational Unit Name (eg, section) []: If you are a business; Write the appropriate division of your company. It is best to use something generic such as "IT".
Common Name (e.g. server FQDN or YOUR name) []: Enter your domain name
Email Address []: Enter your email address
This will create and autosave your CSR and Private Key. Also, make sure to reboot your server to save all changes.
Step 2. Buy SSL Certificate + Setup
The following step in the installation process is to order and configure an SSL Certificate. We have them available at SSLTrust with our exceptional Customer Service, Money Back guarantee and SSL Installation Service. Here is a bit of information about SSL Certificates to help choose the best for you and your website.
SSL certificates vary in pricing based on the level of validation they provide. Domain Validated (DV) certificates are typically the least expensive as they only verify domain ownership.
Organization Validated (OV) certificates, which validate the organization's details, are priced higher due to the additional verification process. Extended Validation (EV) certificates, offering the highest level of validation and trust, are the most expensive. The price reflects the thorough verification processes and the increased assurance they provide users visiting your website.
Cheap SSL Certificates
View our low cost SSL Certificates with domain validation.
Starting at $ per year
You can choose the SSL Selector on our website. If you're still unsure of what certificate to choose for your business, please contact our Sales Team and they will be glad to help you out.
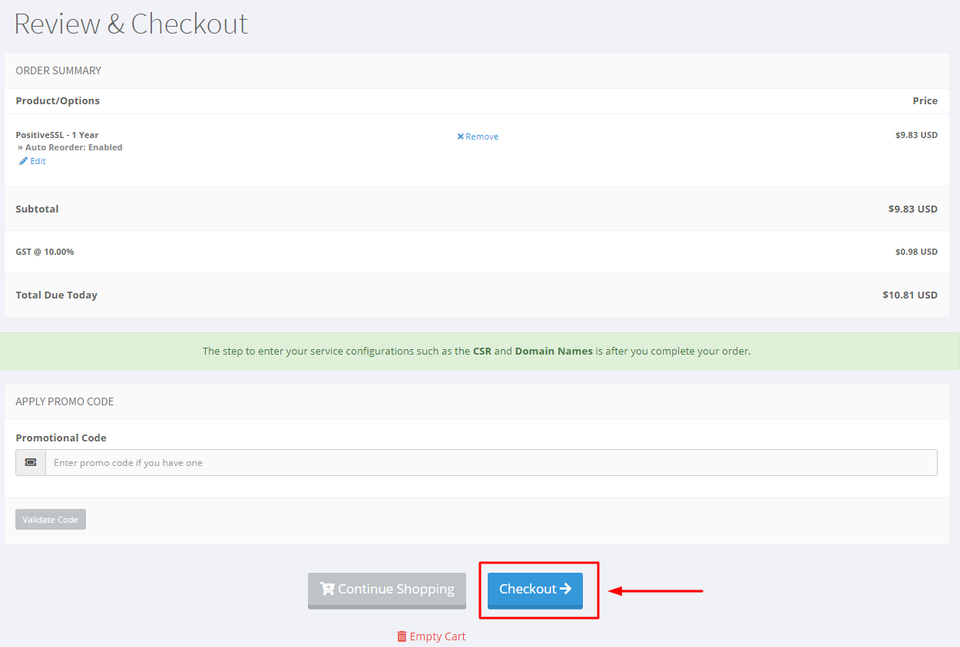
1: Add the SSL Certificate your cart and complete the checkout process.
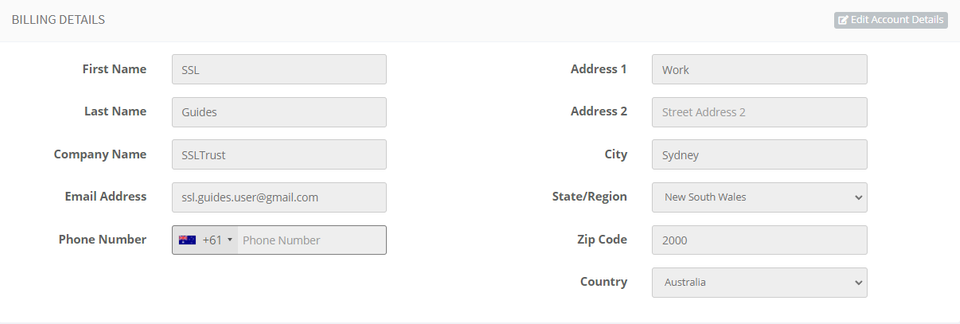
Provide your account information
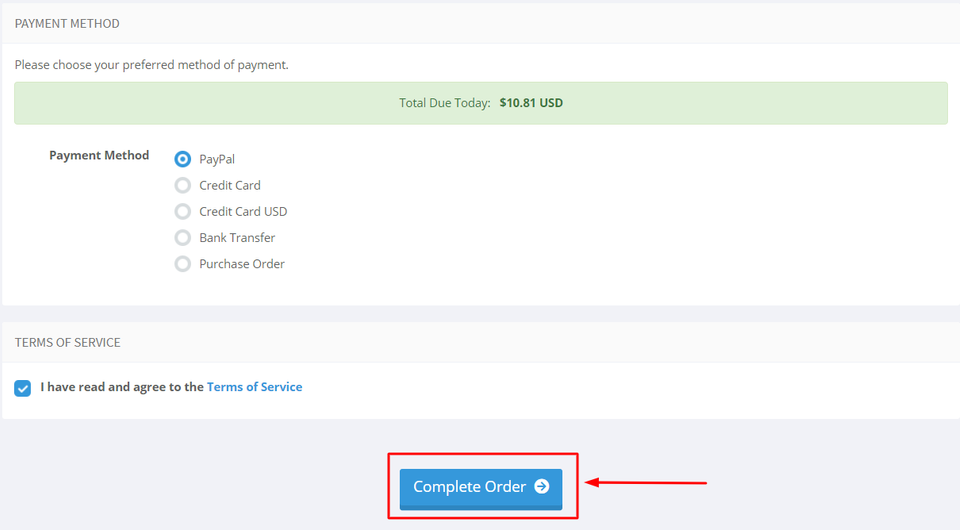
Pick the payment option you prefer, then click on the checkout button
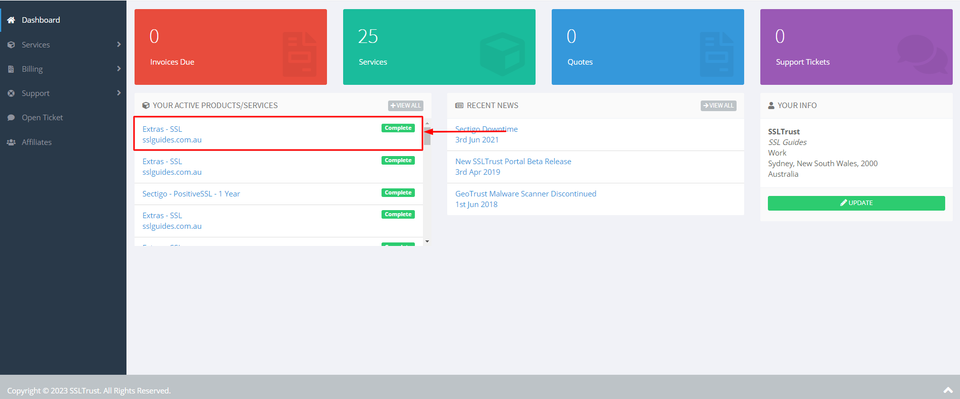
2: Following your SSL Certificate purchase, you're ready to commence configuring it. To complete this action, navigate to your SSLTrust account and handle your latest purchase. Access the SSLTrust Dashboard, then navigate to Services and select My Services.
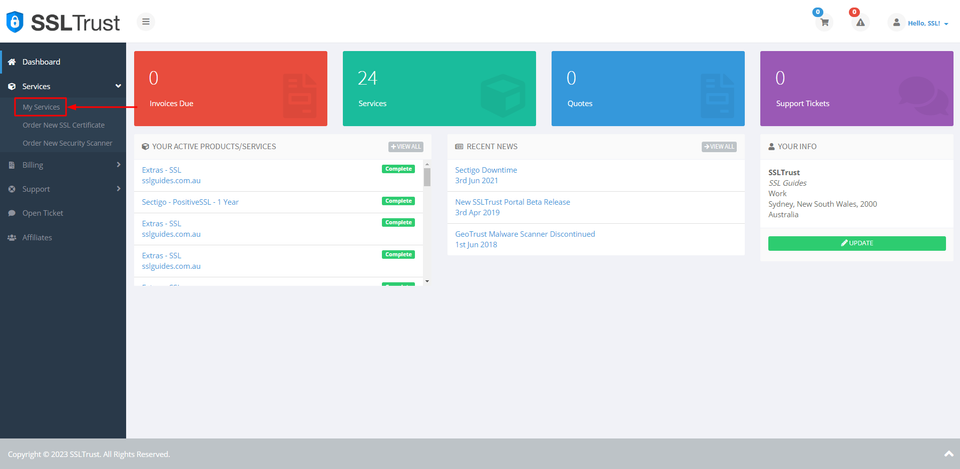
Your purchased certificate and order status should be visible to you. Next, click on Manage.
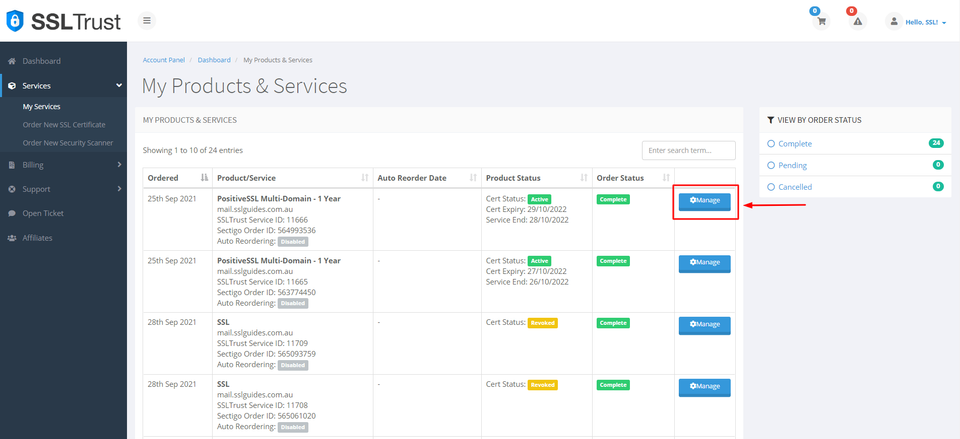
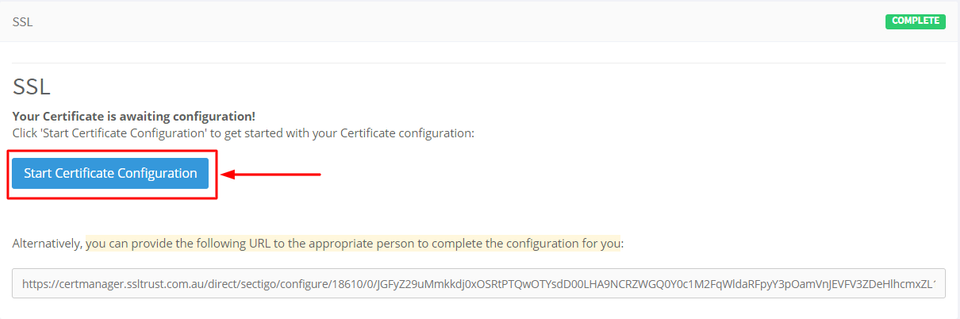
Upon clicking Manage, you'll find yourself on the Product Details page of your SSL Certificate. Choose "start configuration" to personally configure the settings, or alternatively, share the URL below with the relevant person for them to handle the configuration on your behalf.
3: Ensure that the CSR (Certificate Signing Request) previously generated is copied and pasted here in the following format.
text
-----BEGIN CERTIFICATE REQUEST-----
  -----END CERTIFICATE REQUEST-----

Then, click on Verify CSR.
If the CSR details align with the inputs you've previously provided, you can proceed; otherwise, generate a new CSR with accurate details.

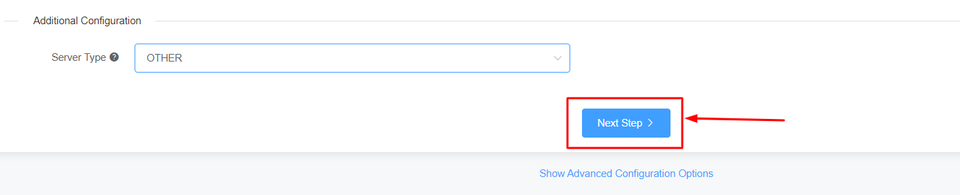
Select the Server Type and click on Next Step.
4: Kindly fill out your contact details.
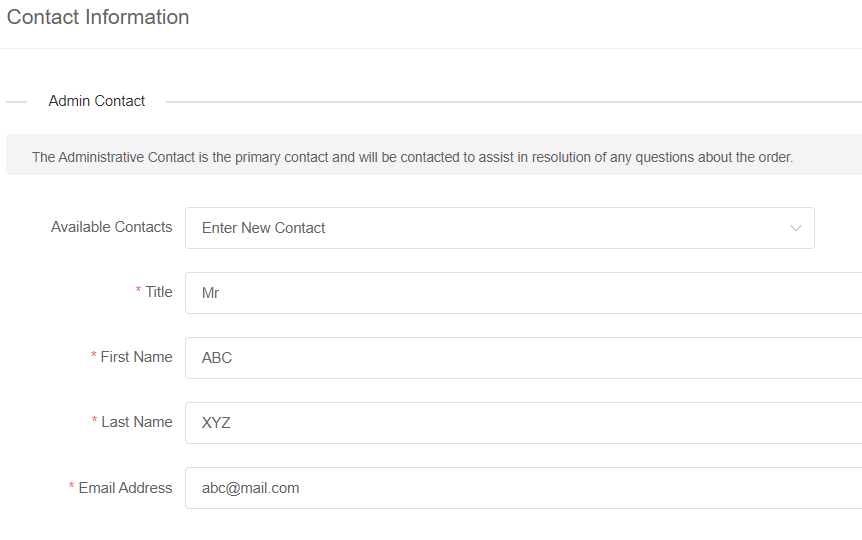
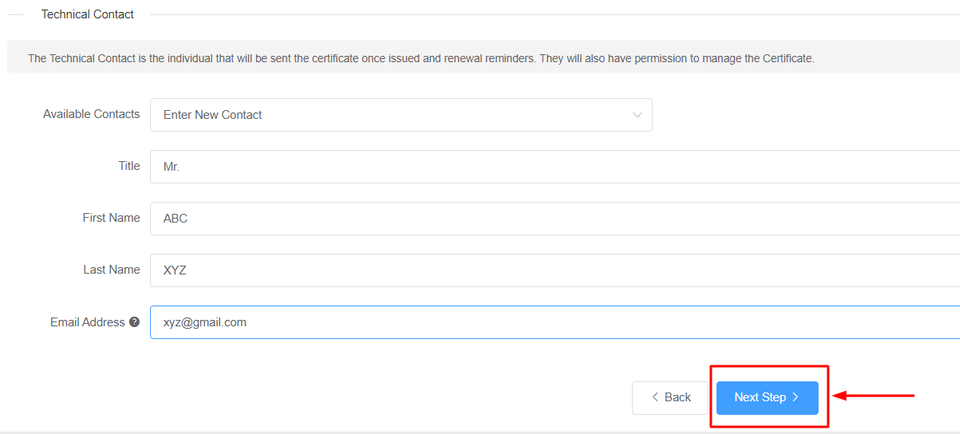
Please provide the details of your technical contact, if they are managing the certificate for you.
Authorization will be provided to them for managing the certificate, and renewal reminders will be sent.
In order to acquire a business SSL certificate, it is necessary to furnish your business information, which includes your accurate address, phone number, and legal entity name. Verification of the accuracy of this information will be conducted by the Certificate Authority.
Errors could potentially result in delays in the process.
Then, click on Next Step
5: The next step in this process is Domain Control Validation (DCV).
Domain Control Validation (DCV) is a process used to verify domain ownership for SSL certificate issuance. It ensures that the entity requesting the certificate has administrative control over the domain, enhancing online security and trustworthiness.
Verifying an SSL certificate's legitimacy through this process is essential for bolstering online security.
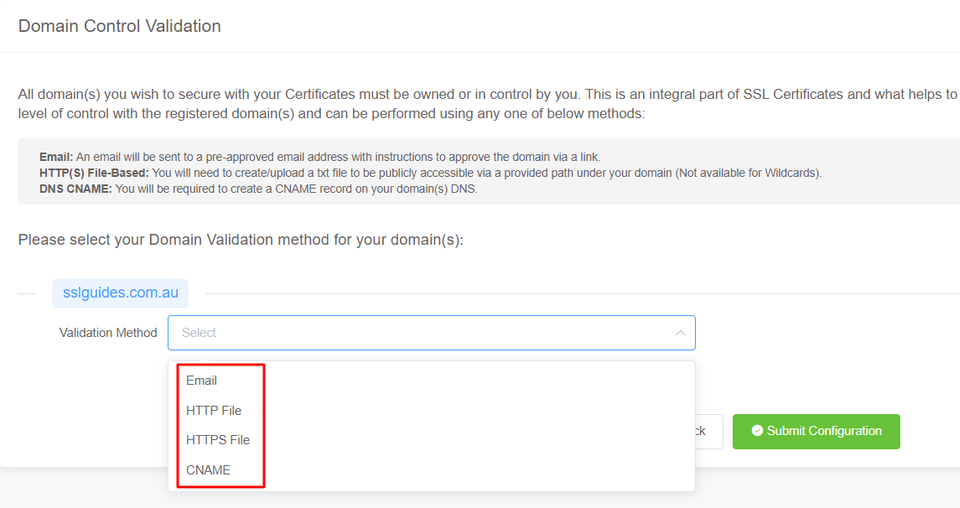
Pick the method that suits you best. Having an email address with the domain name will be the quickest way to proceed.
You'll receive an email containing a validation link. Clicking on the link should confirm your domain name.
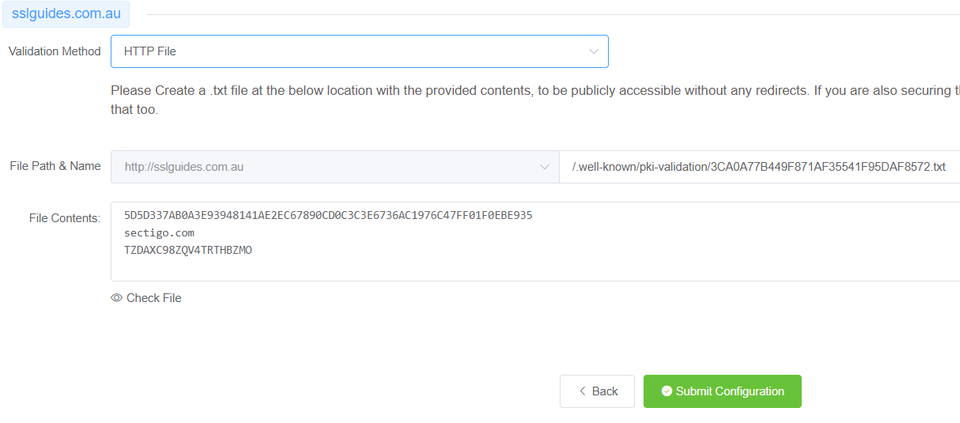
Using the HTTP/HTTPS File Validation Method, create a folder in the designated directory, paste the contents, and your domain will undergo validation.
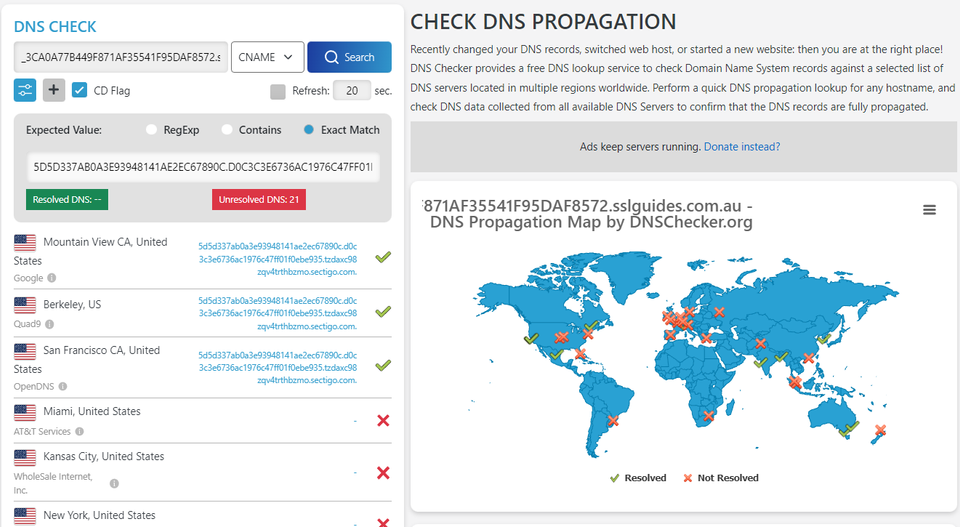
CNAME Validation represents the final method for validating your domain name.Essentially, you need to create a CNAME record in your DNS Settings to validate your domain name. Afterward, click on the "Check DNS Record" button to confirm DNS changes.

Following a brief interval, typically ranging from a few minutes to several hours, contingent upon your DNS propagation speed, the CNAME record should be validated.
If everything is set up correctly, click the button below to proceed to the validation manager.
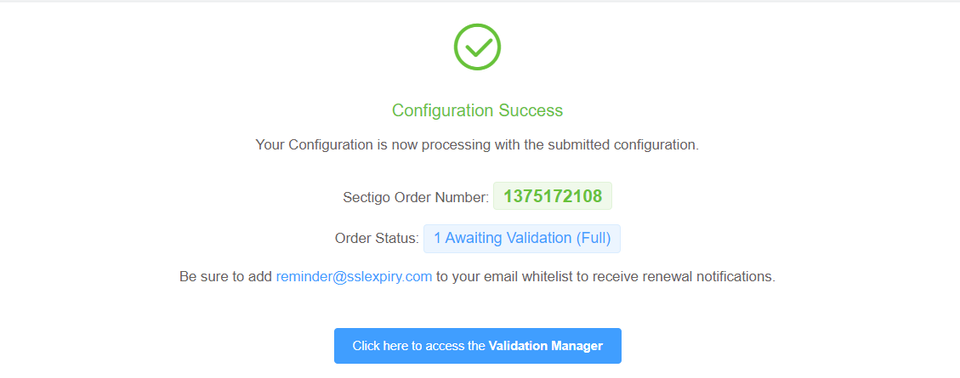
6: After successfully completing all the previous steps, your certificate should now be issued.

Should the certificate not be issued, click on Domain Control Validation, and resubmit your chosen validation method.
After successfully validating your domain with the chosen method, your SSL certificate will be issued.
For customers who have ordered a Business SSL, it's important to wait for the Certificate Authority to validate your business address and phone number. If the validation process isn't finalized or if you haven't received your certificate after a specific time frame, please reach out to the support team for assistance regarding your certificate's status.
Step 3. Download + Install SSL Certificate
After your SSL certificate is issued, you'll receive an email containing the certificate directly from the Certificate Authority. Alternatively, you have the option to download the certificate from the SSLTrust Portal, which provides it in an easy-to-use format.
Return to the SSLTrust Dashboard and access your certificate by clicking on it.
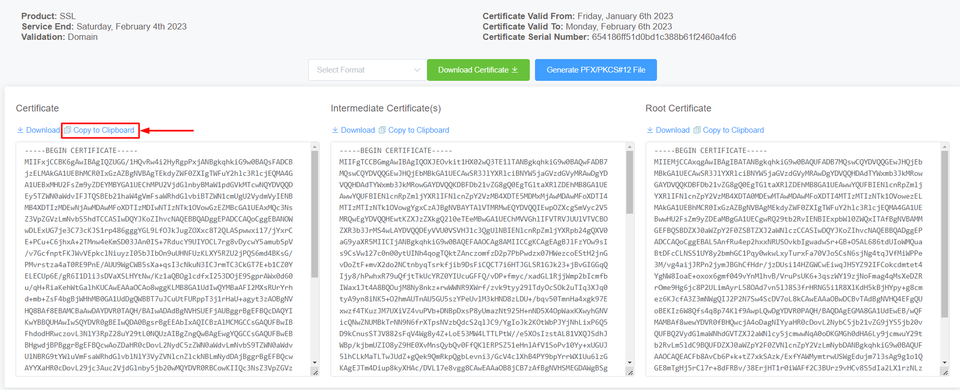
1: Click on Collect/Download Certificate-
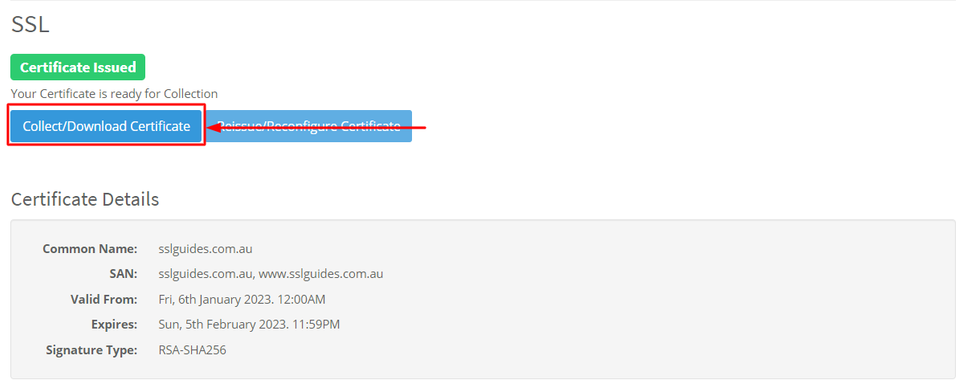
Go to the first column and click on copy to clipboard
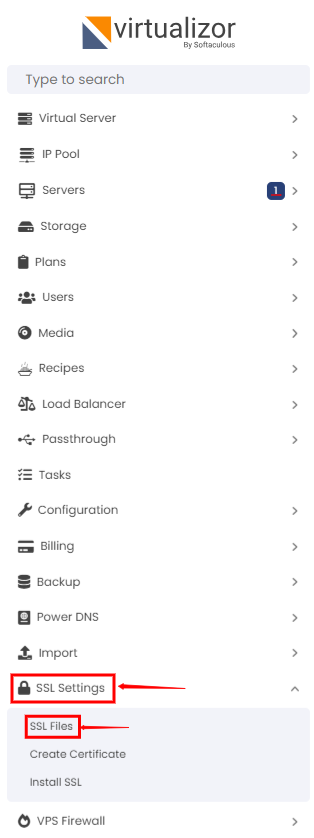
2: Head to the dashboard again on Virtualizor. Navigate to the SSL Settings on the bottom left and then click on "SSL Files"
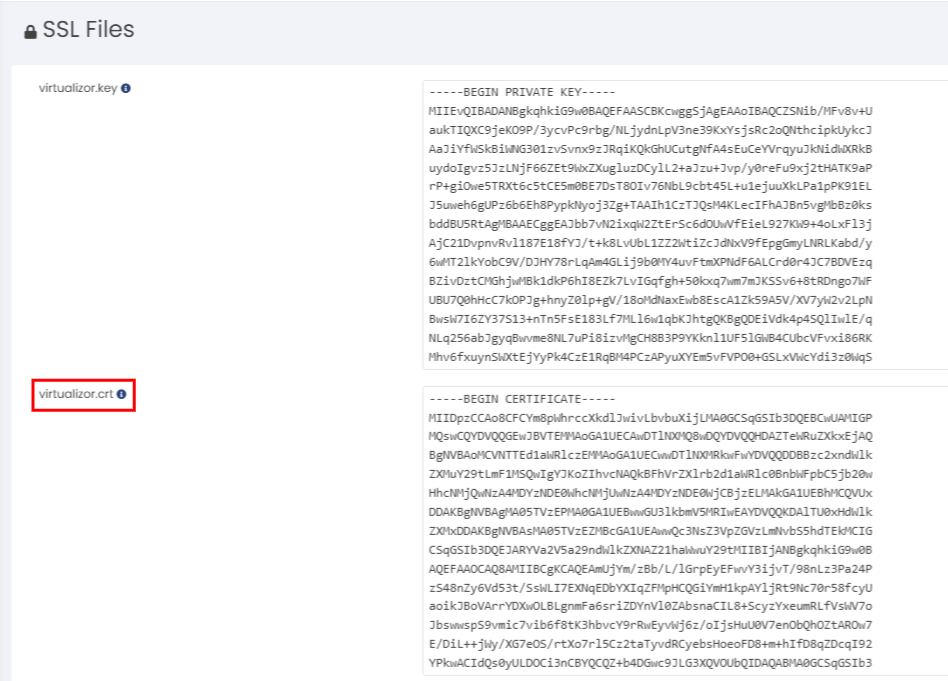
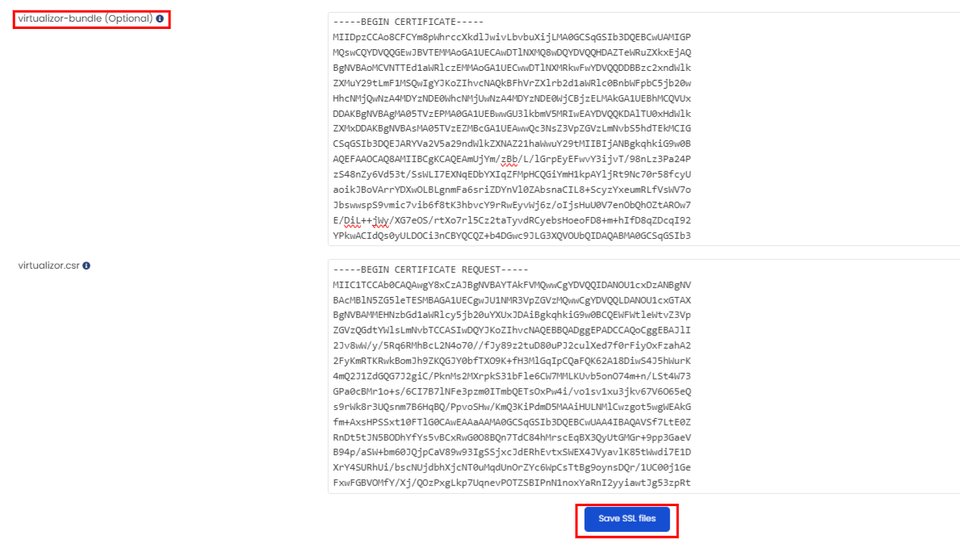
3: Paste in your copied main certificate in the virtualizor.crt Dialog Box
4: Head back to the certificate collection page and click on copy to clipboard on the Intermediate certificate.
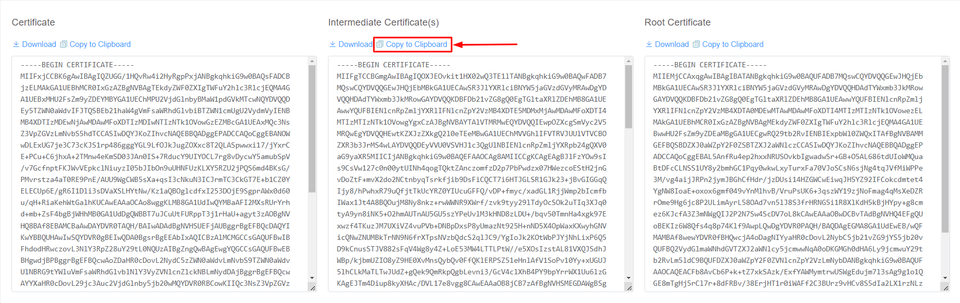
5: Paste your Intermediate Certificate in the Virtualizor Bundle dialog box and click on " Save SSL Files".
Now, navigate to https:// yourdomain.com to view your secure website.
Step 4. Check SSL Certificate
SSLTrust's Free SSL Checker is a tool that allows you to test and validate the SSL/TLS certificates installed on websites. Simply enter a domain name and it will analyze the certificate, providing details like the issuer, expiration date, encryption strength, and whether the certificate is properly configured and trusted by major browsers and operating systems. In SSL tests, receiving an "A" rating typically signifies that the SSL certificate and its configuration meet high security standards.
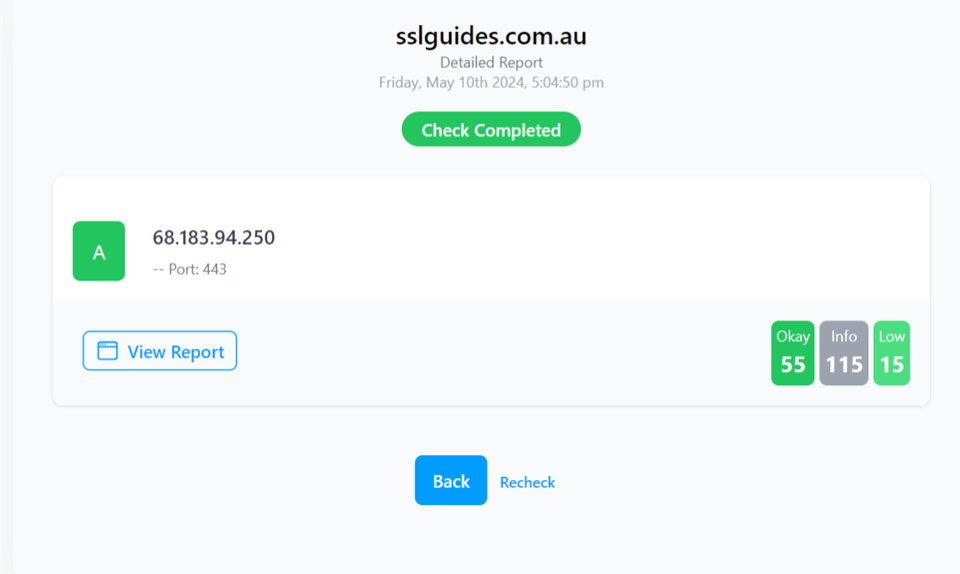
The checker highlights any potential security issues or misconfigurations with the SSL implementation. This free tool makes it easy to verify if a website's SSL certificate is valid and secure, giving visitors confidence their connection is encrypted and their data is protected from eavesdroppers.
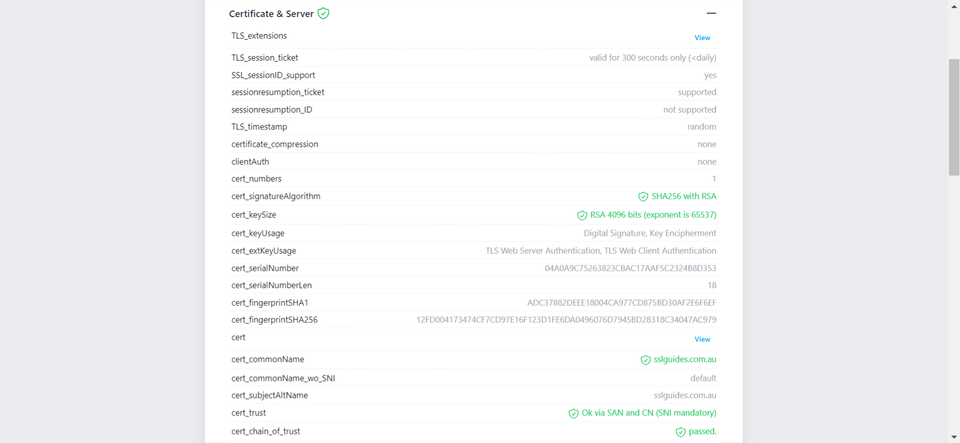
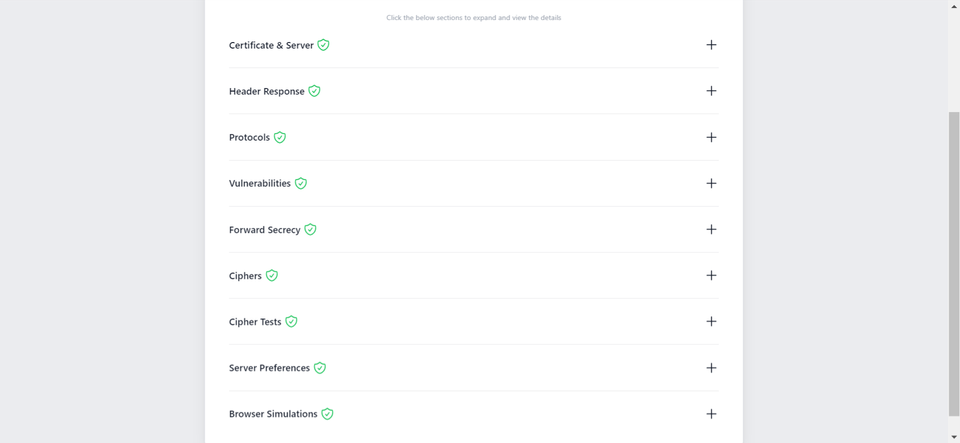
Additionally, you can also performed a detailed check which generates an actionable report with all the ins and out of your SSL Certificate. This includes Protocols, Ciphers, Vulnerabilities and much more.
-
You might require assistance from your web developer or make the necessary updates to your website personally to ensure that all files utilize "https://" and all links leading to and within your website employ "https://".
Discussions and Comments
Click here to view and join in on any discussions and comments on this article.